
Chimney Flashing Repair in Buffalo, NY: Why the Patch Keeps Failing and What Actually Fixes It
Chimney flashing repair in Buffalo typically runs $450–$1,200 for a proper two-part repair that addresses both the metal flashing and the mortar bed it seals against. Most homeowners who’ve had flashing “repaired” twice in two years paid for a surface-only fix that ignored the freeze-thaw damage underneath. If you’re seeing water stains on the ceiling near your fireplace this spring, call (833) 632-3568 — Thomas Hernandez, our owner and lead technician, can inspect the chimney side of the joint and tell you whether the problem is flashing, masonry, or both.
If a Roofer Patched Your Flashing Last Spring and It’s Leaking Again, the Flashing Wasn’t the Whole Problem
We see this pattern every March in Buffalo. A homeowner calls a roofing company after a lake-effect winter, the crew tar-seals the counter-flashing where it meets the brick, and by the following January water’s coming through the drywall again. On a 100-year-old Buffalo chimney, it rarely is just the flashing.
Here’s what the roofer missed: the mortar joint that the counter-flashing is mortared into has been through 80–100 freeze-thaw cycles since last spring. Lake Erie’s wet snow saturates those joints, the temperature drops twenty degrees overnight, and the water expands inside the mortar. By year three or four of this cycling, the bed is crumbly and loose. You can seal flashing to powder all day long — the sealant adheres to nothing. That’s why we repoint first, then reset and seal the flashing. Anything else is a temporary patch that Buffalo’s climate will destroy.
I grew up on Buffalo’s West Side, a few blocks from Olmsted’s Delaware Park, and I’ve spent 11 years on roofs across this city. The chimneys in Elmwood Village, the East Side, and South Buffalo were built during that 1880–1930 peak growth era — solid brick, often multi-flue, originally sized for coal furnaces. The masonry is thick and generally good, but the mortar beds at the roofline take an absolute beating. Thomas Hernandez learned early in his career that if he wouldn’t let his own family light that fireplace, he’s going to tell you straight — and a loose counter-flashing on crumbling mortar is exactly that kind of problem.
The Two-Part Failure: Why Buffalo’s Pre-WWII Chimneys Need a Chimney Specialist, Not a Roofer
There’s a trade-boundary issue here that costs homeowners money. Roofers own the roof plane — the step flashing, the apron, the shingles. Chimney specialists own the chimney side — the counter-flashing, the mortar it embeds into, the crown condition above it, and the flue liner inside. When water enters at the chimney-roof intersection, both trades can point fingers.
In our experience across Buffalo’s older neighborhoods, the entry point is on the chimney side about seventy percent of the time. The counter-flashing has pulled away from the brick, or the mortar bed it was tucked into has disintegrated, or the crown above has cracked and is dumping water directly onto the flashing assembly. A roofer sees step flashing that looks intact and declares the roof sound. A chimney specialist — someone who spends every day inside and on top of masonry flues — recognizes that the counter-flashing is floating on failed mortar and that sealing it without repointing is pointless.
This distinction matters because we’ve met homeowners in South Buffalo who were sold full roof replacements when a $650 chimney-side flashing and repoint repair would have solved it. Thomas’s 11 years of chimney-specific work means he can distinguish the two on inspection. He’s not guessing based on shingle age; he’s reading the masonry, the mortar hardness, the crown pitch, and the flue condition as an integrated system.
Our Chimney Repair service covers this full scope — we don’t send you to a second contractor for what is fundamentally a chimney-side problem.
What We Check During a Flashing Inspection
- Counter-flashing embedment depth — Is it still securely mortared into a raked joint, or has freeze-thaw cycling loosened it?
- Mortar bed integrity — We probe the joint with a pointing tool; if it crumbles to powder, repointing is required before any flashing reset.
- Crown condition — A cracked or improperly sloped crown channels water directly to the flashing assembly, undermining any repair below.
- Step flashing integration — Where the roof’s step flashing meets our counter-flashing, we verify overlap and seal continuity.
- Flue liner and interior signs — Water entry often leaves telltale stains on the liner or smoke chamber that confirm the leak path.
What Chimney Flashing Repair Actually Costs in Buffalo
Pricing depends on whether we’re doing a reset-and-seal on sound mortar, or a full repoint-and-reset where the bed has failed. The table below reflects what we’ve charged across Buffalo homes over the past three years. These are real ranges — not teaser rates that balloon on site.
| Service | Low | High |
|---|---|---|
| Counter-flashing reset and seal (sound mortar bed) | $350 | $550 |
| Counter-flashing repoint, reset, and seal (failed mortar) | $550 | $850 |
| Full flashing assembly replacement with new copper or galvanized steel | $750 | $1,200 |
| Crown repair or replacement (when required for water management) | $400 | $900 |
| Interior water-damage inspection and liner assessment | $0 | $150 |
We don’t charge for the initial inspection that determines which category you’re in. If the mortar’s sound and it’s a simple reset, we’ll tell you. If it’s a two-part repair, we’ll show you the powdery joint before we quote the work. Nearly 300 homeowners have trusted us across 11 years in this trade, and our 4.7-star average on 297 reviews reflects that we don’t upsell what’s not needed.
The Correct Repair Sequence for Buffalo’s Climate
When we handle a flashing repair on an old Buffalo chimney, the sequence is non-negotiable. Skip a step and the lake-effect cycle will destroy the work within twelve months.
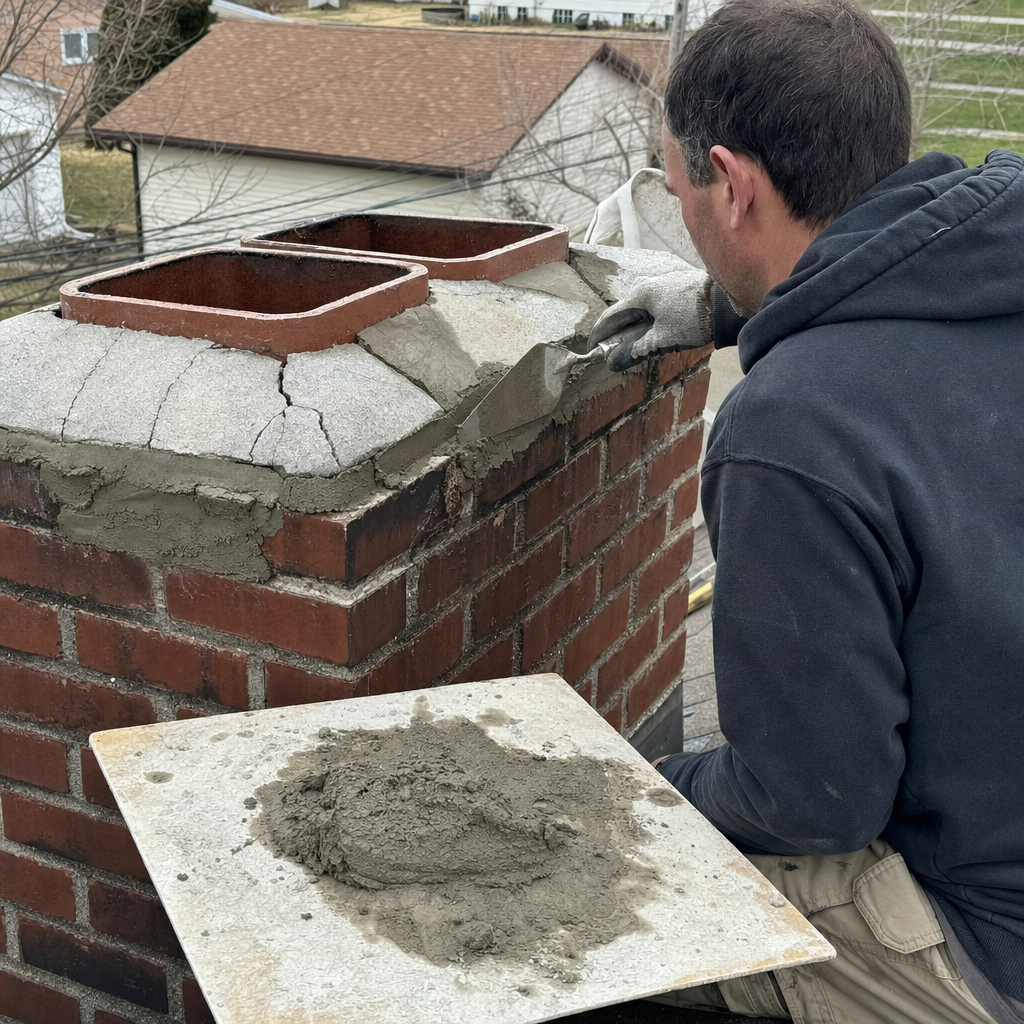
Step one: Repoint the affected mortar joints. We grind out the deteriorated mortar to a minimum 3/4-inch depth — deeper if the freeze-thaw damage has penetrated — and repoint with a Type N mortar mix formulated for Buffalo’s exposure. The joint has to cure properly before any flashing stress is applied; we don’t rush this.
Step two: Reset the counter-flashing. Once the bed is solid, we re-embed the existing counter-flashing if it’s in good shape, or fabricate and install new copper or heavy-gauge galvanized steel if the old piece is corroded or improperly sized. We use professional-grade materials — Gelco and Famco components when the application calls for manufactured solutions, custom-fabricated copper when the chimney geometry demands it.
Step three: Seal and integrate. The counter-flashing-to-brick seal gets a high-temperature, UV-stable sealant. The counter-flashing-to-step-flashing overlap gets checked for proper coverage — we need at least four inches of overlap, properly fastened, to handle wind-driven rain and snowload.
Step four: Crown and cap verification. Before we leave the roof, we confirm the crown is shedding water away from the flashing assembly, not toward it. If the crown has cracked or lost its pitch, we address it — because a flashing repair with a failed crown above it is a repair that won’t last.
This is why we carry HeatShield and Olympia Chimney materials as part of our standard inventory — we’re not running to a supplier mid-job. Thomas shows up personally with the components to complete the full chimney-side scope in one visit.
Why “Chimney Flashing Repair” Is a Chimney Trade, Not a Roofing Trade
We’re not knocking roofers — they have a hard, skilled trade, and when the leak is in the shingles or the step flashing, you need a roofer. But the chimney side requires knowledge of masonry behavior, flue dynamics, and the specific failure modes of pre-WWII construction that most roofing crews simply don’t encounter daily.
In Buffalo’s housing stock — those dense neighborhoods of brick Victorians and Queen Annes built during the 1880–1930 boom — the chimneys were designed for coal. The flues are oversized, the mortar is lime-based and more porous than modern Portland mixes, and the thermal cycling from a modern gas insert or wood stove stresses the system differently than the original coal furnace did. A chimney specialist recognizes that the flashing isn’t just keeping water out of the attic; it’s protecting a masonry structure that was never designed for the appliance now venting through it.
When you hire Titan, you’re getting one company for your full chimney — cleaning, repair, caps, crowns, liners, and rebuilds. There’s no coordination between a roofer and a chimney company, no finger-pointing when the leak persists, and no surprise that the “simple flashing job” also needed mortar work. Thomas makes the call on site, does the work himself, and stands behind it.
FAQs
A proper chimney flashing repair in Buffalo costs $450–$1,200 depending on whether the mortar bed beneath the flashing has failed. If the counter-flashing simply needs reset and seal on sound mortar, expect $350–$550; if freeze-thaw cycling has destroyed the mortar joint and repointing is required first, the repair runs $550–$850. Call (833) 632-3568 for a free inspection and exact quote — we don’t charge to determine which category you’re in.
The repair likely addressed only the metal flashing without repointing the mortar joint it seals against. In Buffalo’s climate, lake-effect snow saturates mortar joints that then refreeze and expand 80–100 times per season; by spring, the bed is powdery and any sealant applied to it fails within months. The correct fix is repointing first, then resetting and sealing the flashing — a sequence many generalist roofers skip.
Call a chimney specialist if the leak originates at the chimney side — counter-flashing, mortar bed, or crown — which it does in roughly seventy percent of cases we see on Buffalo’s pre-WWII homes. Roofers handle the roof plane; chimney specialists handle the masonry interface, and only a chimney professional can assess whether the mortar bed, crown condition, or flue liner are contributing to the leak. Titan handles the full chimney-side scope so you don’t need two contractors.
If the repair is a straightforward reset and seal on sound mortar, yes — Thomas carries the materials and tools to complete most flashing repairs in a single visit. If repointing is required, we need to let the mortar cure before resetting the flashing, which typically means a return visit within 48–72 hours. Either way, the inspection is free and we’ll give you a firm timeline before any work begins. Call (833) 632-3568 to schedule.
Get It Fixed Right Before the Next Lake-Effect Season
Buffalo’s freeze-thaw cycle doesn’t pause for anyone. A flashing repair that ignores the mortar bed beneath it will fail by next winter — we’ve watched it happen across Elmwood Village, the East Side, and South Buffalo too many times. If you’re seeing water stains, smelling damp masonry, or just know your chimney hasn’t had a proper inspection since before the last heavy snow, call (833) 632-3568. Thomas Hernandez will inspect the chimney side personally, show you exactly what’s failing, and fix it with the same materials and methods he’d use on his own family’s home. Estimates are free, and we don’t leave you guessing.
Written by Thomas Hernandez, Owner & Lead Technician at Titan Chimney Cleaning Greater Buffalo, serving Buffalo, NY.